|
||
 |
||
| A Newsletter for Unisys EAE and Agile Business Suite Clients | October 2018 | ||
Microsoft Azure and VSTS: An Agile Business Suite How-to Preview
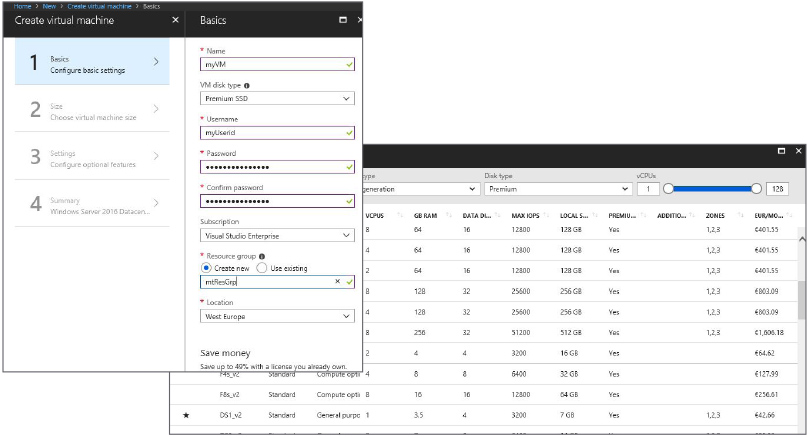
By Rob Henrichs, IT Specialist, Unisys Note: This article documents some of our observations from an early proof-of-concept project we conducted using an implementation model that is not currently supported/is not qualified for use with the current release of AB Suite. Although we are currently evaluating ways to support your use of AB Suite with these capabilities, Unisys makes no promises as to when or if it will release a final commercial version of the product supporting the implementation model discussed in this article. Unisys also makes no representations about using a cloud environment, and you and/or your organization alone must decide, whether using a cloud-based development environment is right for you, according to your requirements, policies, and the circumstances (including legal and regulatory rules) affecting your use. Working in the cloud has become commonplace these days. And since many Agile Business Suite (AB Suite®) clients have reached out asking how they could develop in the cloud, we decided to investigate the possibilities of using Microsoft® Azure and Microsoft Visual Studio® Team Services (VSTS) with AB Suite Developer and the AB Suite Runtime for Microsoft Windows®. Azure is a cloud service for building, testing, and deploying applications through a network of Microsoft managed data centers. Since AB Suite applications are developed using Microsoft tooling and can be used in a Windows runtime environment, testing in the Azure cloud made perfect sense. In fact, an Azure Windows VM is reachable via an RDP connection – just like any other VM – it’s just located in the Azure cloud. Building Your VMCreating a VM in the Azure Dashboard is a simple, wizard-guided process. You start by defining the
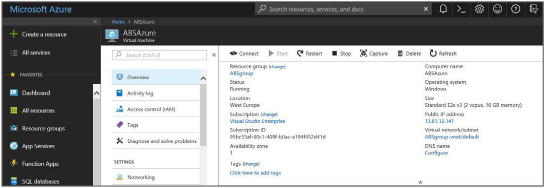
After creating the VM, the dashboard will give you options for starting, stopping, and connecting to it. Select the “connect” button, and you’ll be given an RDP link you can use to connect to the VM exactly as you would with any other server using an RDP client. Adding AB Suite to the VMThe easiest way to get the required AB Suite software onto the VM is to use the option in the Windows RDP client to connect local drives. Or, you could use an Azure storage account and upload the software that way. Once that’s done, you can connect to the storage using a mapped disk. When the necessary software is copied to the VM, you simply install AB Suite as you normally would. Testing the VMWe tested this process by installing AB Suite 6.1 Developer and the Windows Runtime in an Azure VM.
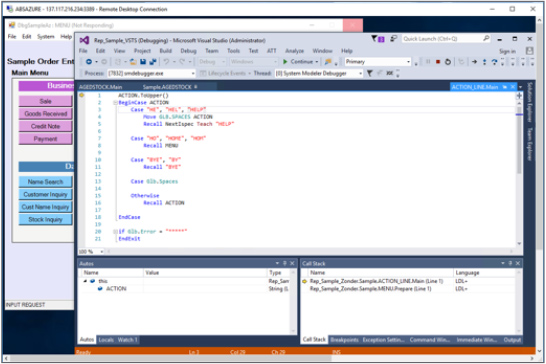
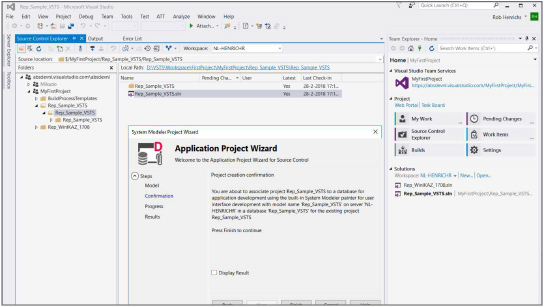
We did a local installation, with all of the necessary Microsoft SQL Server®, Visual Studio, and AB Suite software on the same server. The installation process was very simple and straightforward. One of the primary reasons for testing AB Suite Developer with Azure was to see how it would work with the cloud-based Microsoft Team Foundation Server (TFS) service available in VSTS. To test this, we used a sample Model we had already loaded into VSTS – see the following image – and then connected to VSTS from the Azure VM. This allowed us to automatically build a local Model database from the local VSTS workspace, and then use it to test debugging on a local SQL Server database and check in changes to VSTS.
Using VSTS in this way allows for multiple Azure VMs to be built for and shared by your developers, much in the same way you would with local machines and TFS. In addition to using Debugger, we also investigated deploying a local AB Suite on Windows runtime environment to the same Azure VM as the AB Suite Developer software. This behaved as expected, as the process is essentially no different than building to any local machine. To test access, we connected to the deployed system via a local WinForm client.
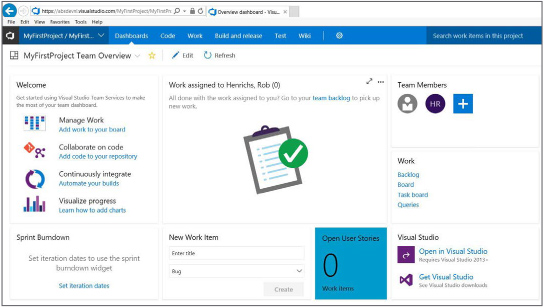
Getting StartedCreating and setting up an Azure VM for use with AB Suite Developer is straightforward and very similar to setting up any standalone laptop, PC, or VM environment. The only real challenge is getting the necessary files, like the installation media, on the VM. Once you complete this step, using VSTS makes spinning up development environments a simple step you can execute without investing in local hardware. The Azure VM behaves as any other VM server, with no special requirements for AB Suite. When using an Azure VM as a standalone development and test environment, it’s essential to use some form of version control, and VSTS is by far the easiest. It’s TFS in the cloud, after all. To get started in VSTS, you’ll first need a Microsoft account. If you don’t have one already, you can create a VSTS account here. After you create an account and log in for the first time, you’ll see a web interface that’s very similar to the one used in TFS.
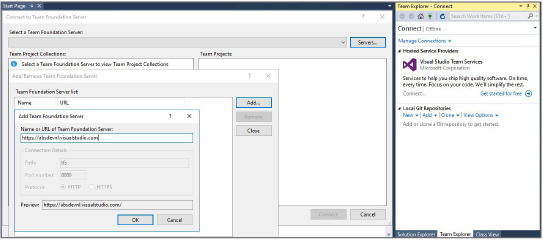
To connect in Visual Studio, go to the “Manage Connections” option in the Team Explorer and enter
After that, open the solution in TFS and AB Suite will request a name for the model database name to be used, just like when connecting to TFS.
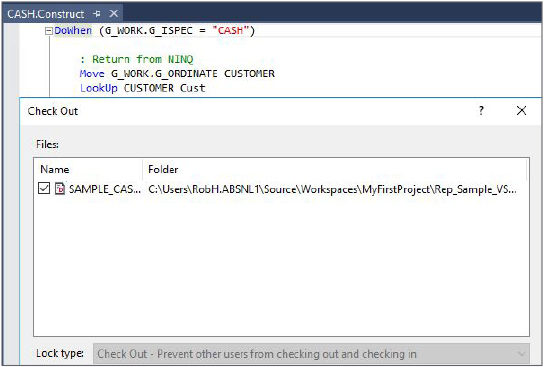
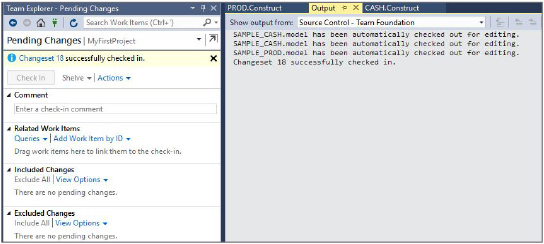
Finish this step, and you’re ready to start using VSTS source control, including the Checkout and Checkin functions, just as you would in TFS.
|
||
|
||
| Subscribe | Unisys.com | Comment | Newsletter Archive | ||
|
||